Controller Electrical Design
1. Overview
2. Battery Life Calculation
3. Main I/O Board
4. Pairing LED
5. Audio Circuitry
2. Battery Life Calculation
3. Main I/O Board
4. Pairing LED
5. Audio Circuitry
Overview
The brains behind our remote controller is the TIVA launchpad microcontroller. Other modules onboard include the XBee for radio communication with hovercrafts, switches for selecting team (red or blue) and bot number (1-4), a potentiometer for measuring the angle of the steering wheel, an accelerometer for measuring the angle of the hook hand, an LED for indicating pairing status, and an audio circuit for playing music while paired. Due to noise issues, we ended up using two 7.2V NiCd batteries: one for the audio circuit, and one for everything else.
Battery Life Calculation
One of the requirements for the controller is that it needs to last for 8 hours of continuous operation. Based on our very conservative calculations, using the 1500 mAh battery we had, we could have lasted 7.8 hours, so we were most likely well above 8 hours of operation. Here is the spreadsheet for calculations.
Note: Power distribution for all circuitry on the controller except the audio speaker was implemented via a power protection board supplied by the course staff. This board regulated 7.2V down to a 5V and 3.3V source.
Main I/O Board
Our main I/O board is built around the TIVA Launchpad. This board branches out to each different module of the user interface on our controller. These modules include a steering wheel potentiometer, a team-selector switch, a bot-selector switch, an I2C accelerometer, an audio speaker, and a pairing LED indicator. Note that if the team-selector switch is flipped while the controller is paired with a hovercraft, it will unpair.

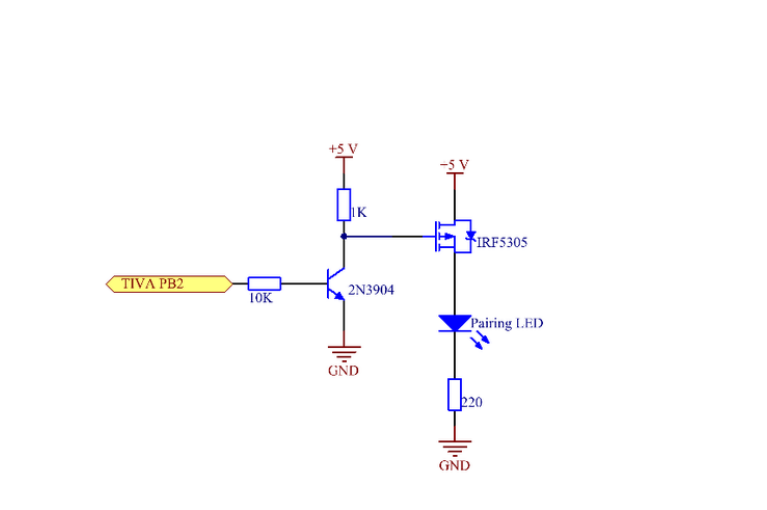
Pairing LED
The pairing LED turns on when the controller is paired with a hovercraft, and then turns off when it unpairs. This circuit allows our TIVA to control the pairing LED without having to directly source current to it.
Audio Circuitry
Our audio circuit allows the remote controller to play songs, such as the Pirates of the Caribbean theme. This circuit implements a soundboard and audio amplifier in order to drive a 3-inch speaker. The audio circuitry is controlled by a single digital pin from the TIVA. Because this circuit sinks a relatively high amount of current, it is powered by its own battery.

